![]()

![]()
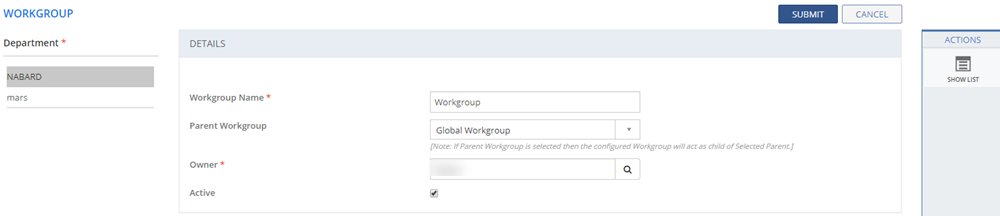
A Workgroup is a group of members in a Tenant or a unit in an organization who are authorized to perform a specific set of business activities. You can add and modify Workgroup details for a Tenant.
To configure Workgroups:
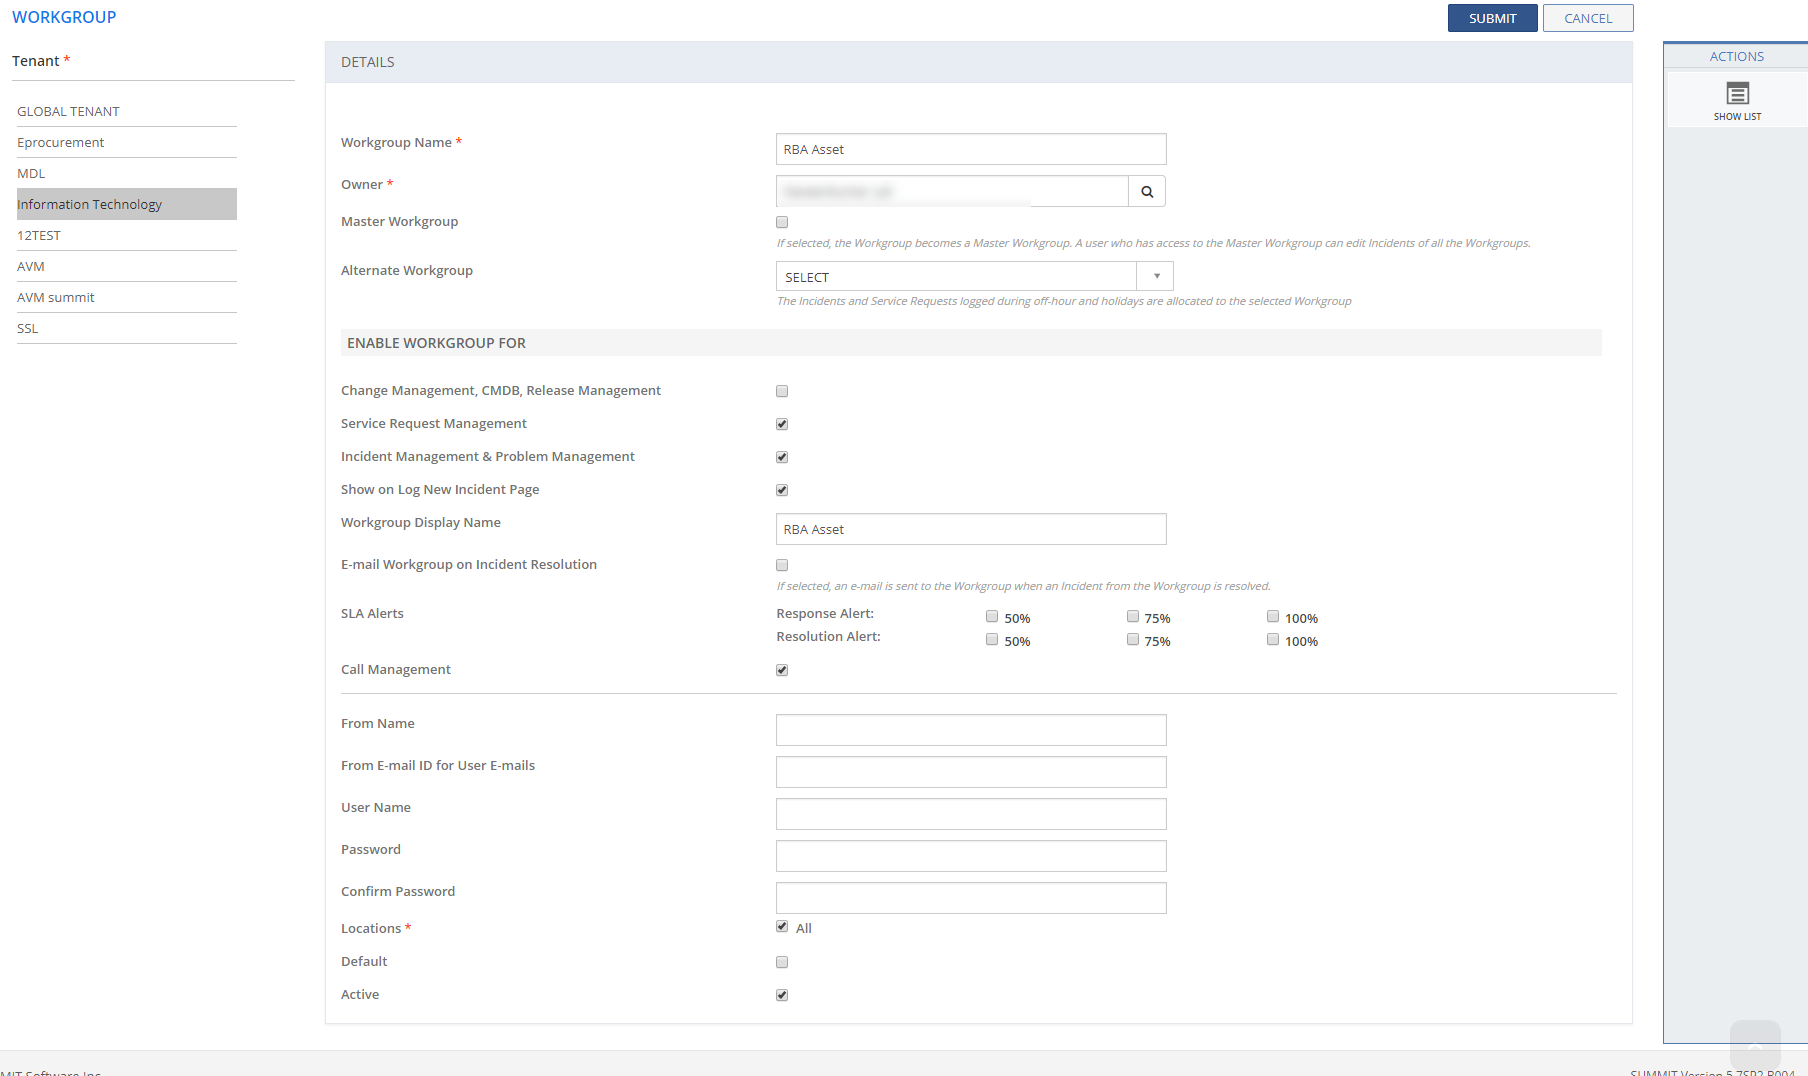
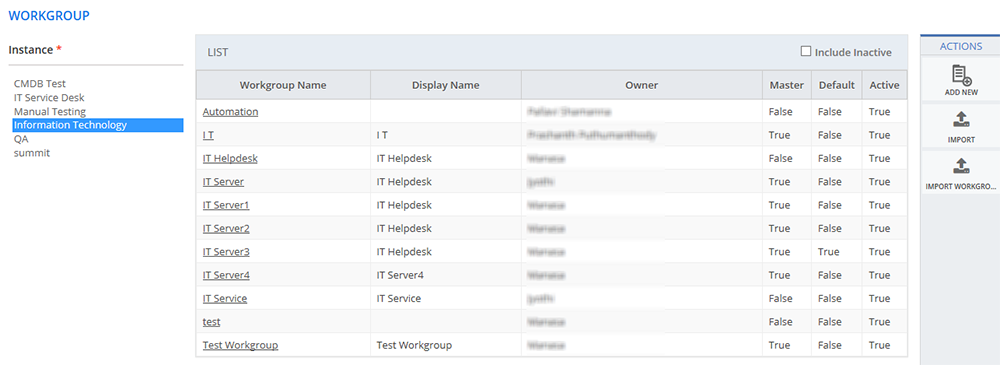
Figure: WORKGROUP page
The following table describes the fields on the WORKGROUP page:
| Field | Description |
| DETAILS | |
| Workgroup Name | Type in a name for the Workgroup. |
| Parent Workgroup | If selected,
the workgroup specified in the Workgroup
Name field becomes the
child Workgroup of the selected Parent Workgroup.  See
Screen Shot. See
Screen Shot.
|
| Owner | Type in the name of the person who heads the Workgroup. To search for a user, click the Search icon. |
| Master Workgroup | Select this check box to define a Workgroup as a Master Workgroup. For any Tenant, you can define one or more Workgroups as Master Workgroup. Analysts who are members of a Master Workgroup can edit Incidents of all the Workgroups. For example, in a Help Desk, the first level of support responding to the queries of the End Users is given access to the Master Workgroup so that they can update the Incidents belonging to any Workgroup. |
| Alternate Workgroup | Select an alternate Workgroup from the drop-down to execute during off-hours and holidays configured for default workgroup. |
| ENABLE WORKGROUP FOR | |
| Change Management, CMDB, Release Management | Select this check box to enable the availability of this Workgroup in the Change Management, CMDB, and Release Management modules. If you select the check box, the Add Additional Owner field is displayed. |
| Add Additional Owner | Select this check box to add additional owner(s) for the Workgroups. To search for a user, click the Search icon. The added users are displayed Additional Owners table. |
| Service Request Management | If selected, this Workgroup becomes an available option on all the pages of the Service Management module. |
| Incident Management & Problem Management | If selected, this Workgroup becomes an available option on all the pages of the Incident Management and Problem Management modules. |
| Show in Log New Incident Page | Select this check box to indicate that the Workgroup you are adding to be listed in the Workgroup list on the LOG NEW INCIDENT page. Selecting this check box also enables the Workgroup Display Name option. You can edit the Workgroup Display Name, if required. By default, the Workgroup name is displayed as Workgroup Display Name. |
| Workgroup Display Name | Specify the display label for a Workgroup. |
| E-mail Workgroup on Incident Resolution | Select the check box to send e-mail update to Workgroup Analysts when the incident is resolved. |
SLA Alerts |
Select this check box to specify that the Workgroup Owner must be notified when the SLA requirements (Response and Resolution) are not met by any of the Workgroup member. |
| Response Alert 50% | Select this check box to notify the Workgroup Owner when the total response time agreed in SLA exceeds 50%. |
| Response Alert 75% | Select this check box to notify the Workgroup Owner when the total response time agreed in SLA exceeds 75%. |
| Response Alert 100% | Select this check box to notify the Workgroup Owner when the total response time agreed in SLA exceeds 100%. |
| Resolution Alert 50% | Select this check box to notify the Workgroup Owner when the total resolution time agreed in SLA exceeds 50%. |
| Resolution Alert 75% | Select this check box to notify the Workgroup Owner when the total resolution time agreed in SLA exceeds 75%. |
| Resolution Alert 100% | Select this check box to notify the Workgroup Owner when the total resolution time agreed in SLA exceeds 100%. |
| From Name | Type in the Workgroup name to be displayed to the Users when they receive an e-mail. |
| From E-mail ID for User E-mails | Specify the common Workgroup e-mail id. If it is not specified, the default application e-mail id is used for communication. |
| Call Management | If selected, the Workgroup becomes enabled and available under Workgroup drop-down list on the Call Management module. |
| User Name | Type in a User Name for the Workgroup. |
| Password | Type in a Password for the Workgroup. |
| Confirm Password | Specify the password again to confirm. |
| Locations |
|
| Default | Select this check box to specify this Workgroup as the default Workgroup, which means that this Workgroup will be available as a default selection on the other pages of the application. |
| Active | Indicates the status of the Workgroup.
|
This section explains all the icons displayed on the ACTIONS panel of the WORKGROUP page.